FabBand
PWA that controls wireless music instruments via MIDI over WebRTC and produces sound output. A separate wireless connected device can additionally be connected to quality loudspeakers. PWA orchestrates all music instruments and can add additional sounds such as drum sounds or various effects.

Table of contents
Overview
The FabBand project explores new digital and collaborative ways of making music. We used personal fabrication to built novel music instrument and web development to implement an experimental music controller with the intend to create a new way for a group of musicians to interact with their bandmates—potentially in a remote setting over the network—and make music together. This is especially relevant in the current Corona-influenced era, as musicians in quarantine have not been able to make music and jam live with their bandmates until now.
As part of the project, we fabricated our own musical instruments by using 3D printing and laser cutting techniques. All custom-built instruments were purely digital controllers, which cannot output proper sound on their own, but must interact with another component to output the desired sound. While we normally have to plug digital music controllers into another hardware component for audio amplification/synthesis, in this project we set up and implemented a server to which the instruments publish wirelessly control messages that conform to the OSC messaging protocol. The server listens for these control messages sent by the instruments, does audio synthesis, and finally outputs high-quality sound in nearly real-time.
While this project was developed in the context of a university course, I will discuss in the further course of this article details about the music controller application named The Mix on which I mainly worked on within the scope of the FabBand project.
Constraints
The aim of this project was not to build something production-ready for real musicians, but to investigate new forms of human-computer interaction. The communication techniques used add a small delay when playing the instruments.
Wireless communication via WebRTC and UDP between the instruments and the central server component adds a small delay that would be unacceptable for real musicians, but was good enough for research and observing the interaction of all the components used.
The Mix
In addition to the fabricated music instruments, an experimental music and effect controller named "The Mix" has been implemented that can be accessed openly via the web and used to control various musical aspects, such as:
- the general volume
- the volume of the individual musical instruments in the overall mix
- the tempo of the mix
- effects like reverb
- equalizer functionalities to emphasize the highs or lows of a particular instrument
- adding additional music tracks on top like drum beats, which could be programmed via a beat matrix in the web application's user interface.
You can try The Mix for yourself using the demo link above or via this link. While some of the functionality is tailored to the specific instruments, I highly recommend trying out the beat matrix to program a simple drum beat. Once programmed, try adding some effects to it.
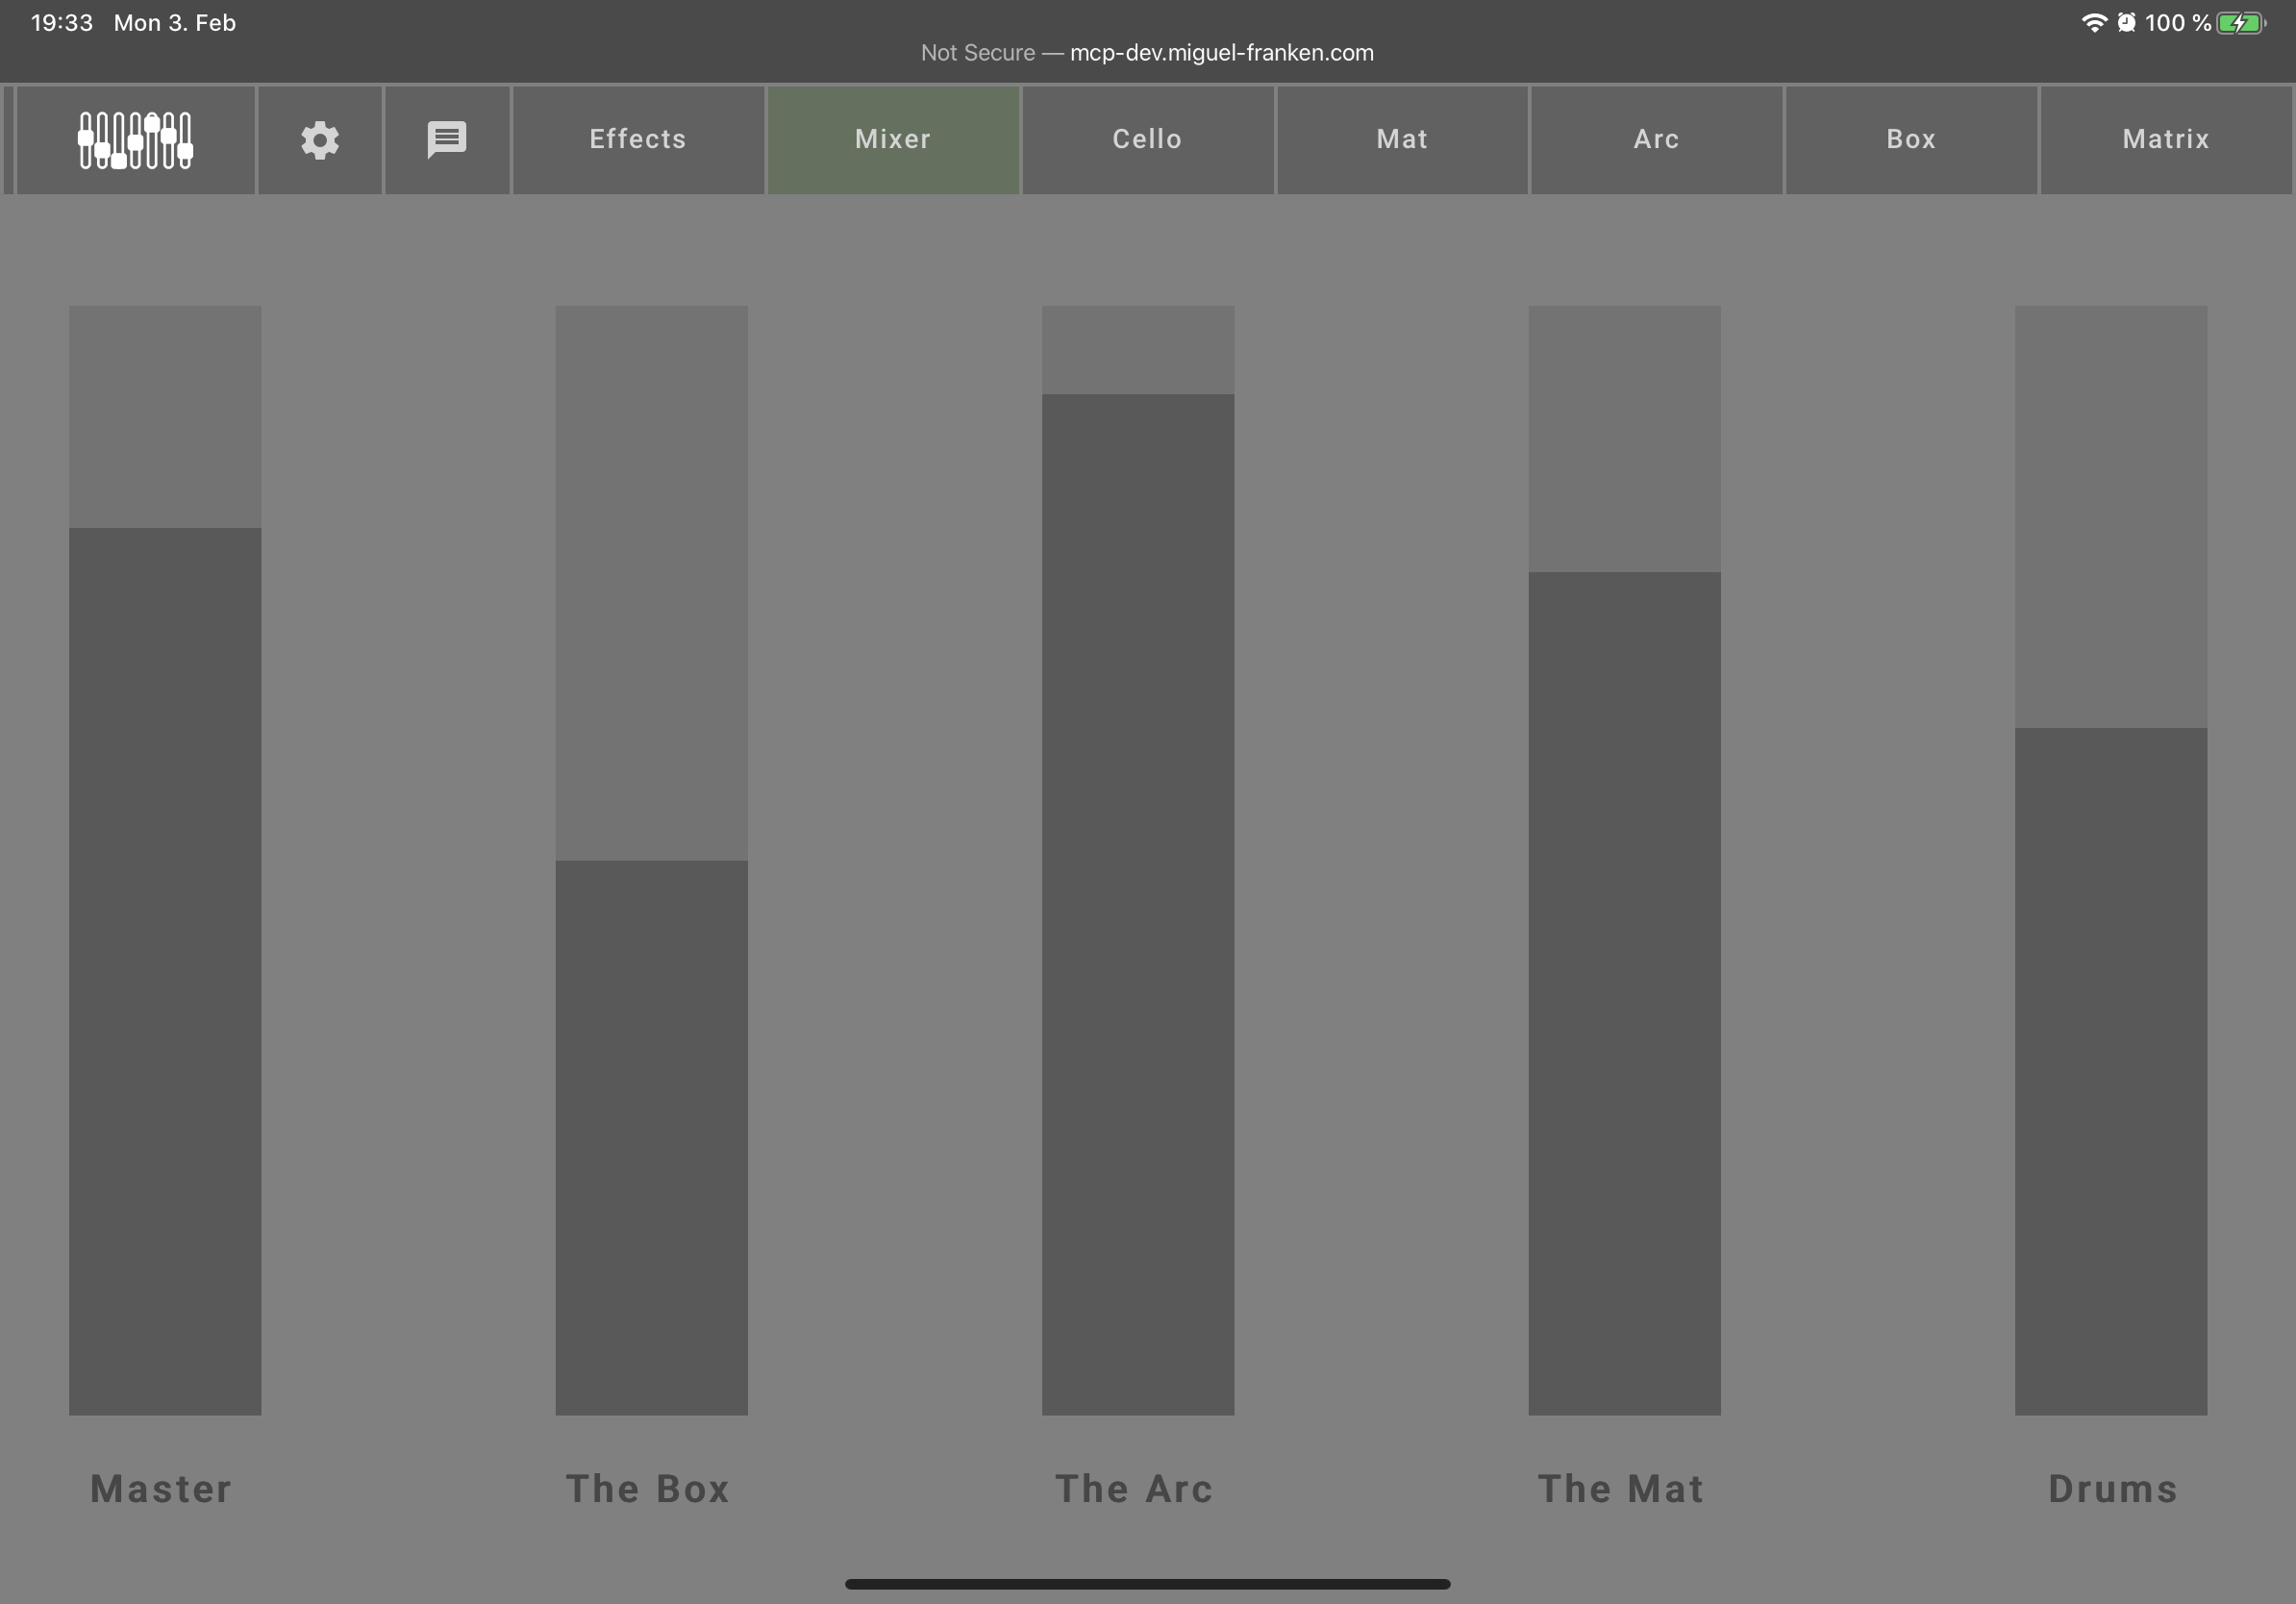
Volume Control
The Mix allows you to set the volume levels of the different instruments and the master channel. Dragging a bar lower will decrease the volume for that instrument.
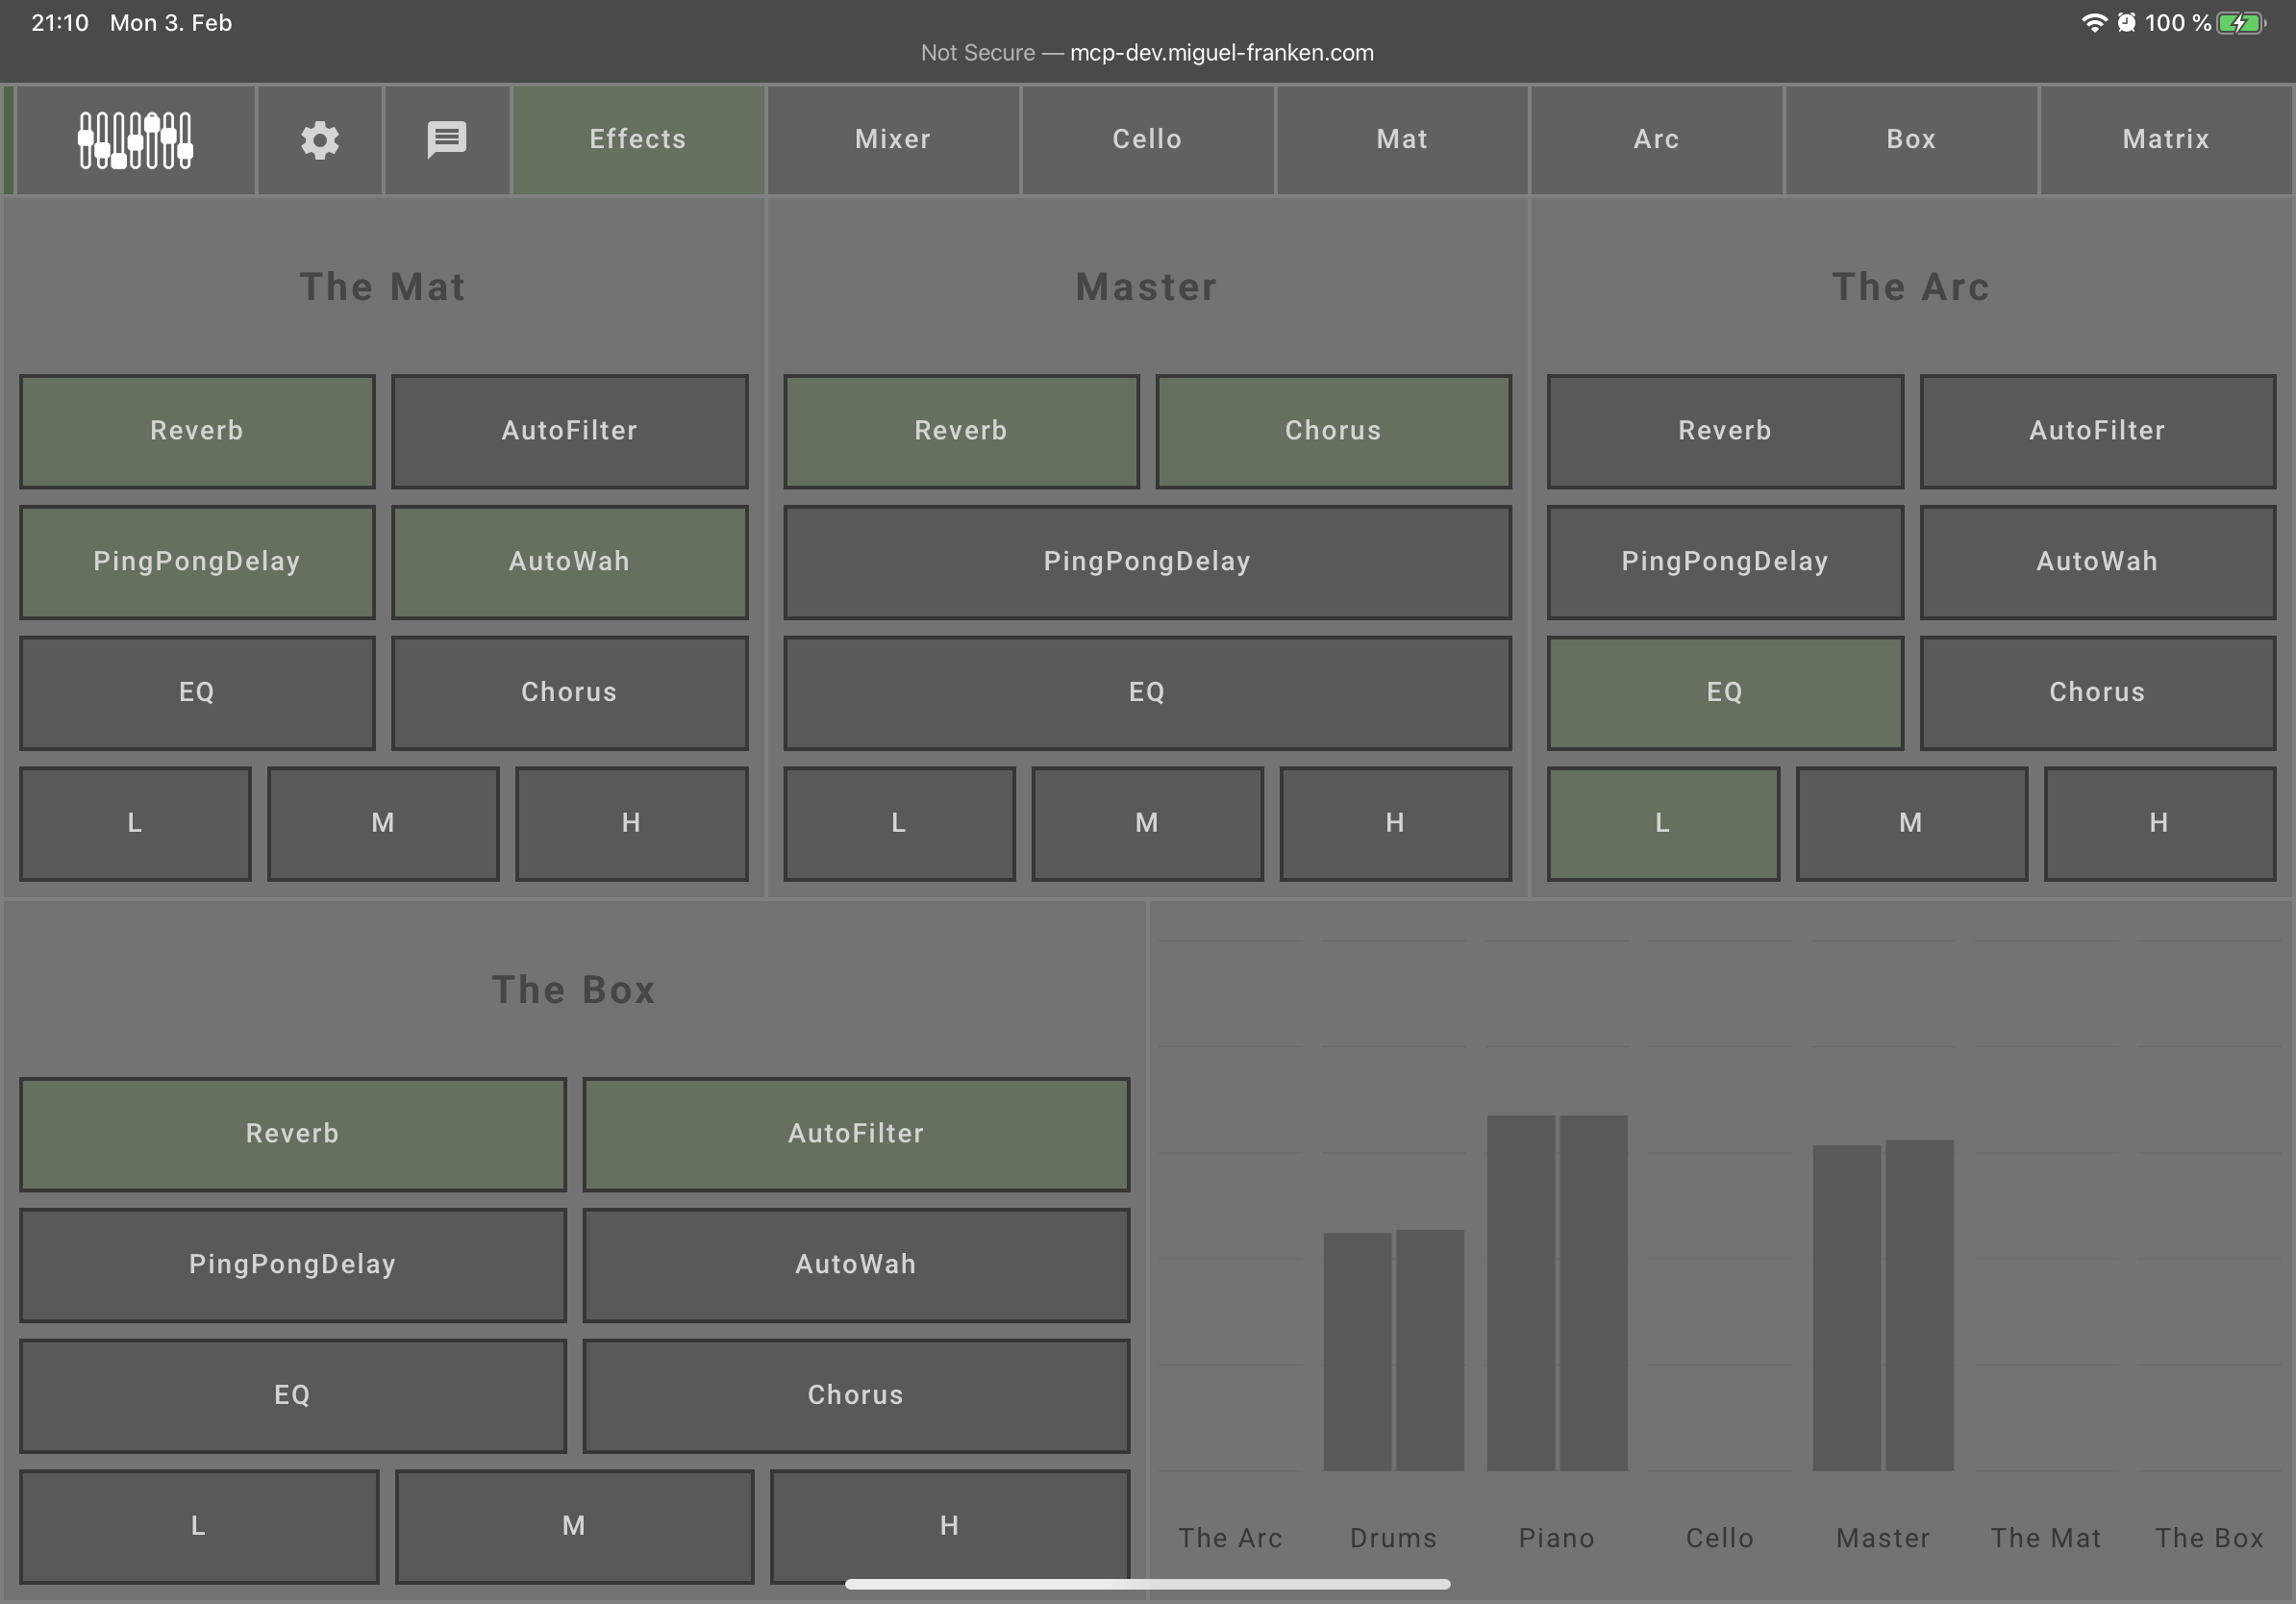
Effects
The effects page allows you to control the effects (reverb, delay, filter, wah, ...) set for each fabricated instrument as well as the master output.
In addition to the effects, the bottom right shows the volume meters for each instrument as well as the master channel. This enables you to judge how loud the different instruments are in relation to each other. It can also be useful when a note hangs to determine which instrument is producing the note.
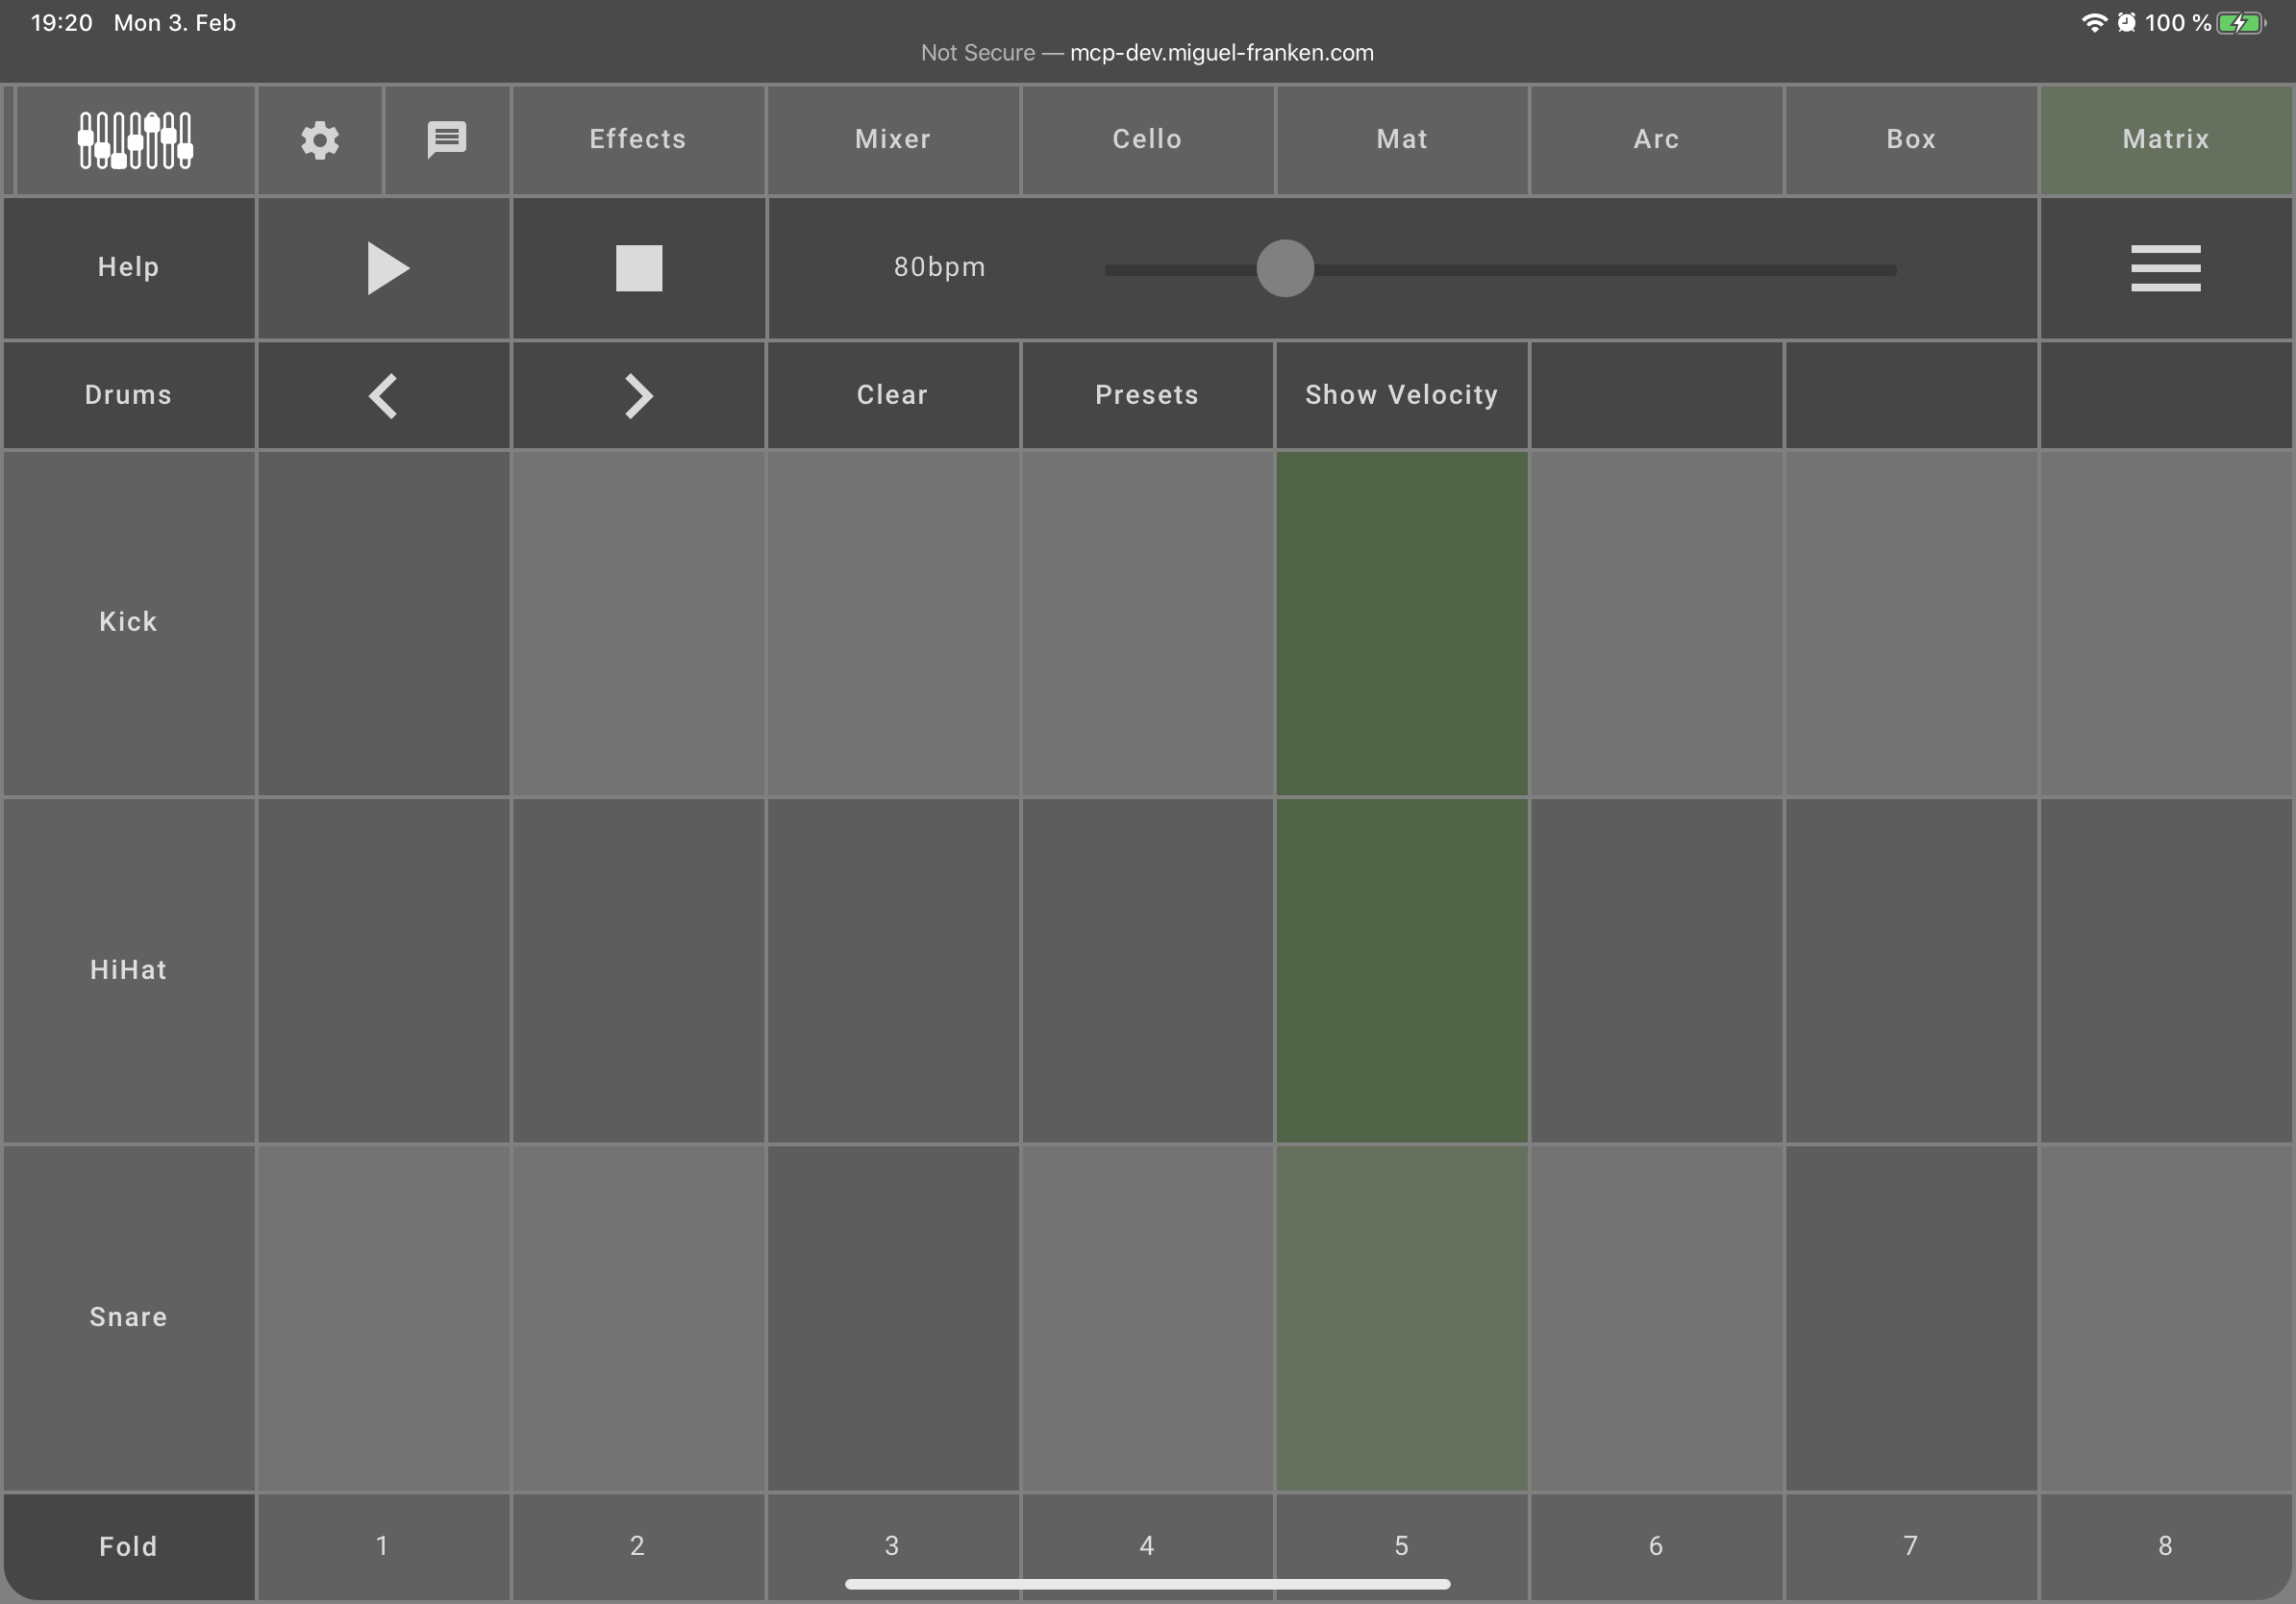
Beat Matrix
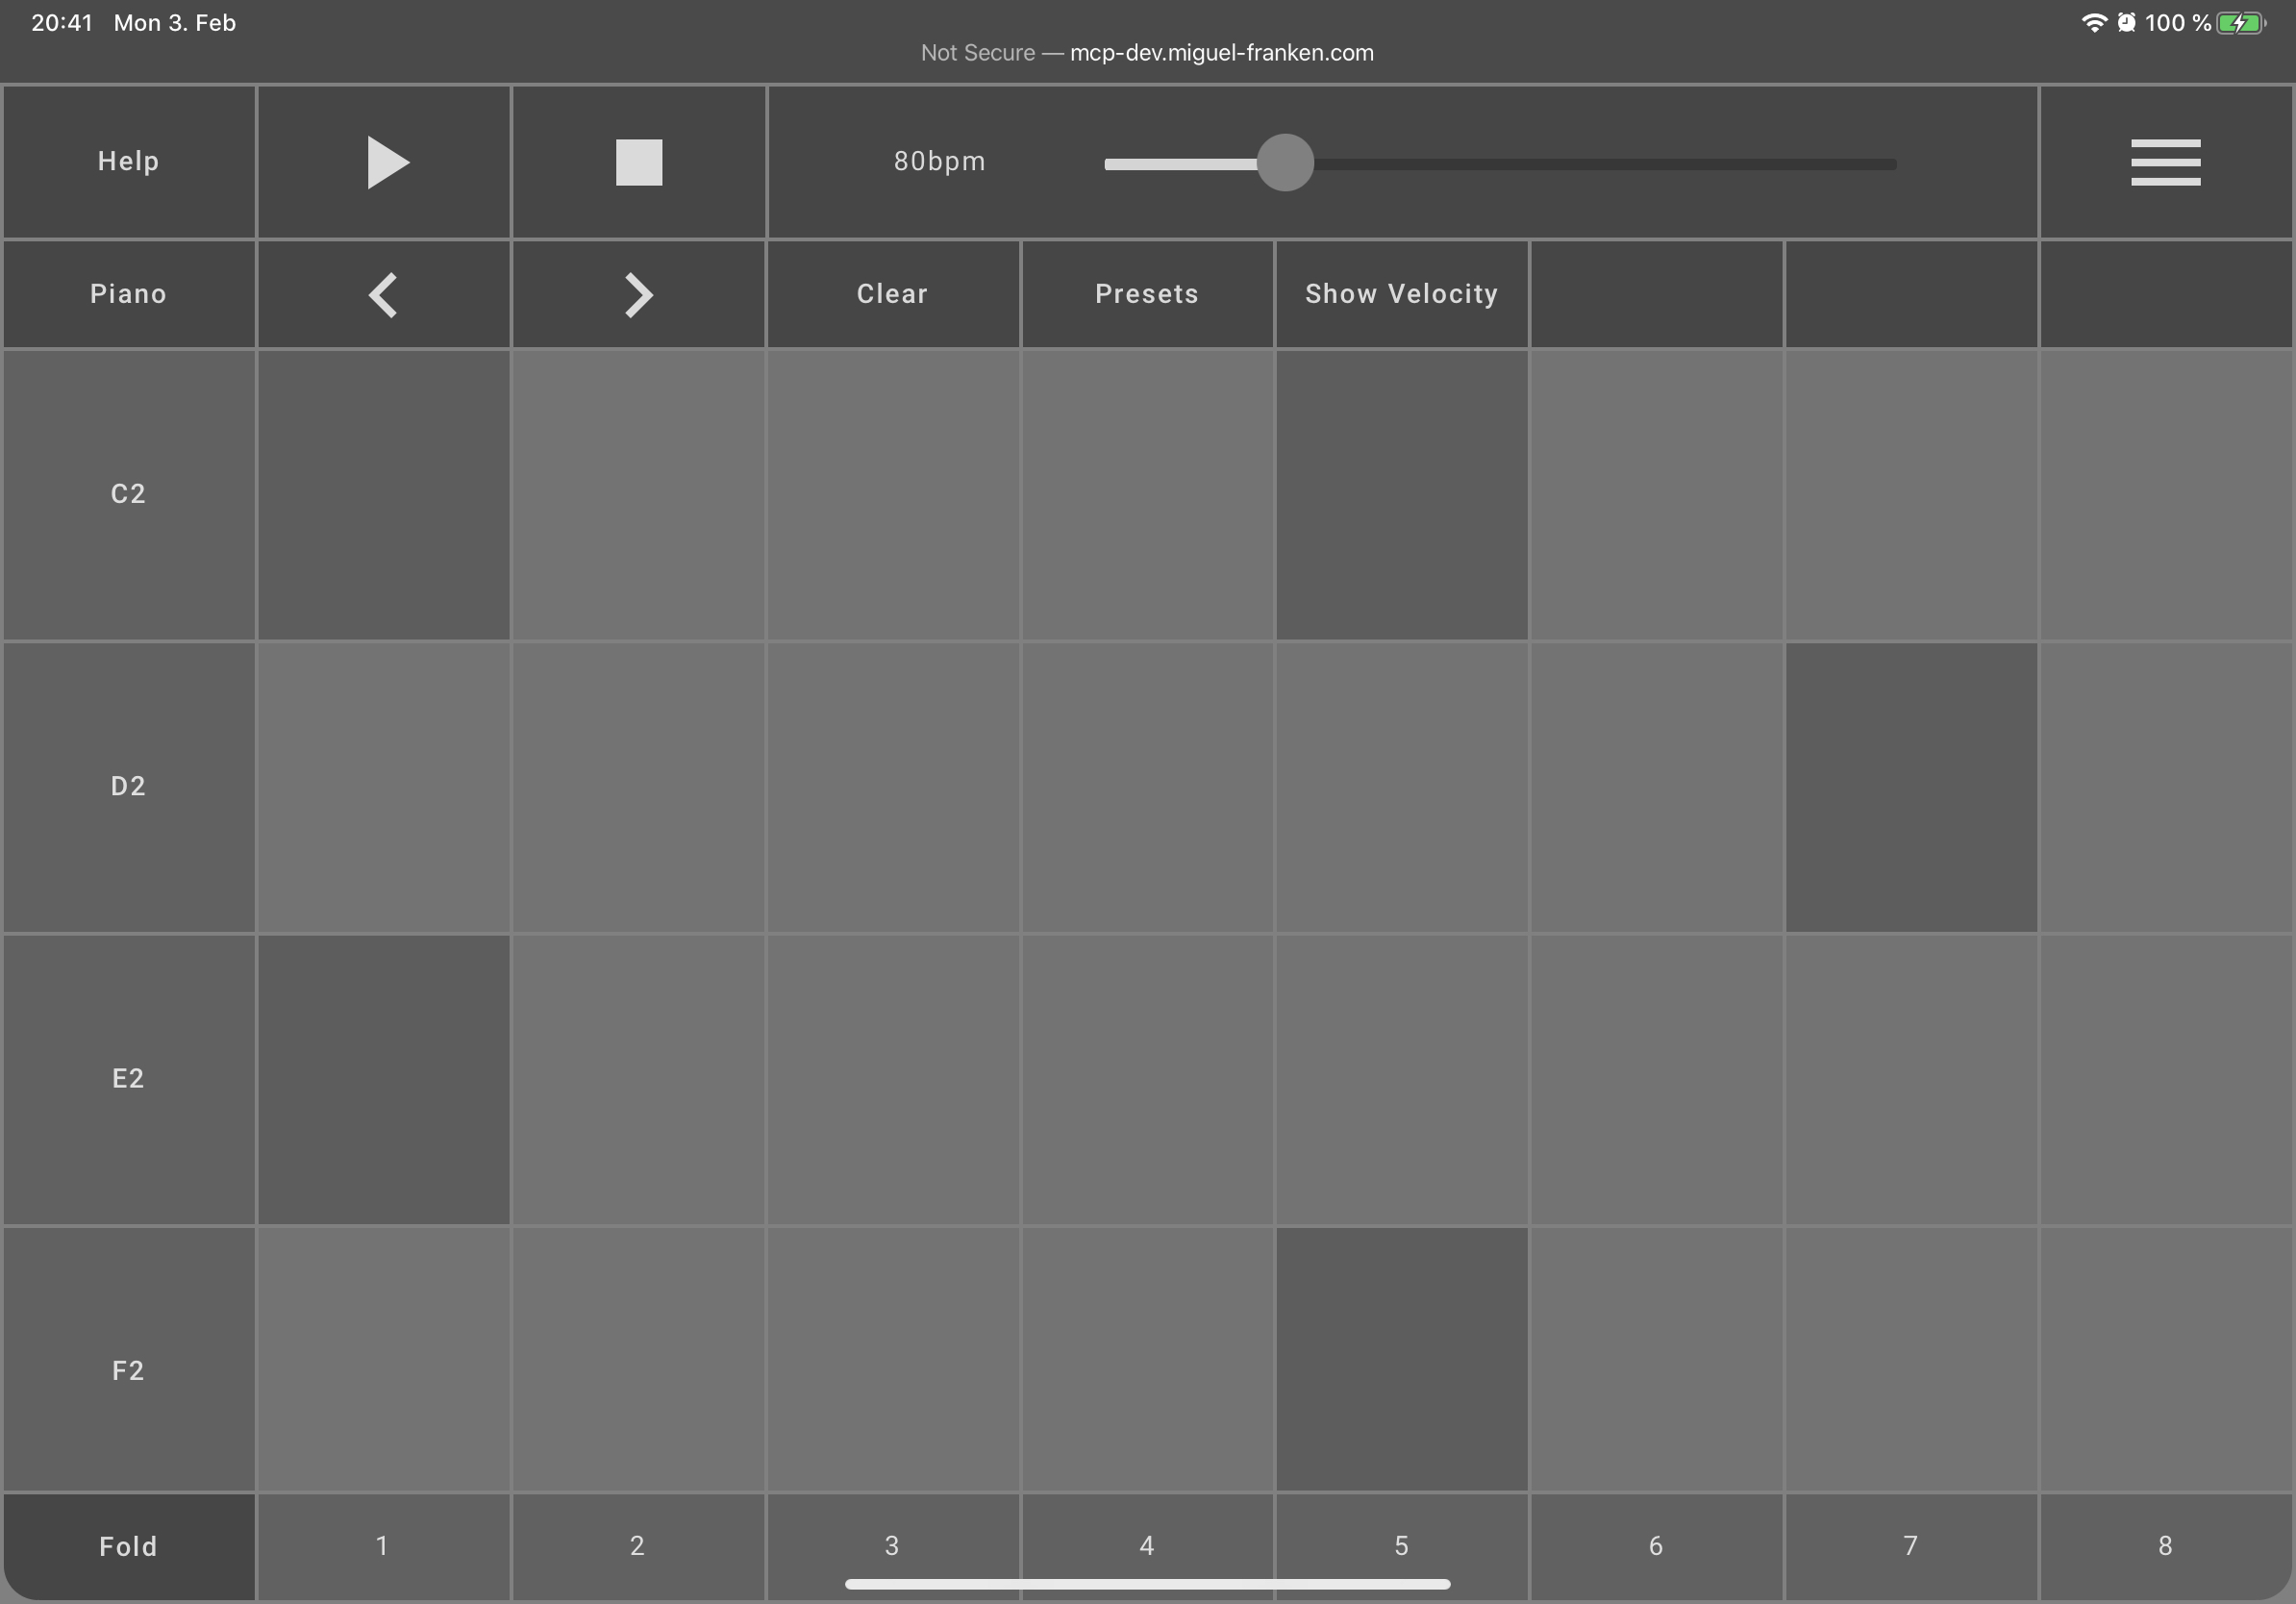
The simplest place to try out The Mix is the beat matrix which allows you to program a simple drum beat and layer a piano melody over it.
The basic idea is that you can place notes on the Matrix by clicking on its cells. Active cells turn a different color. From left to right, notes will be played after each other. Each row represents a different tone. By default, drums are selected and each row represents one piece of a drum kit. Once you have placed some notes, click the play button in the top left.
To the right of these arrows is a button to clear the currently set notes, a button to select a preset arrangement of notes, and a button to show the velocity settings.
You can influence the playback speed by dragging the beats per minute (BPM) slider at the middle top of the menu. Higher values play faster, lower values more slowly.
The right-most "menu"-style button will hide The Mix navigation and bring it back. Use this to immerse yourself in your matrix of sounds.
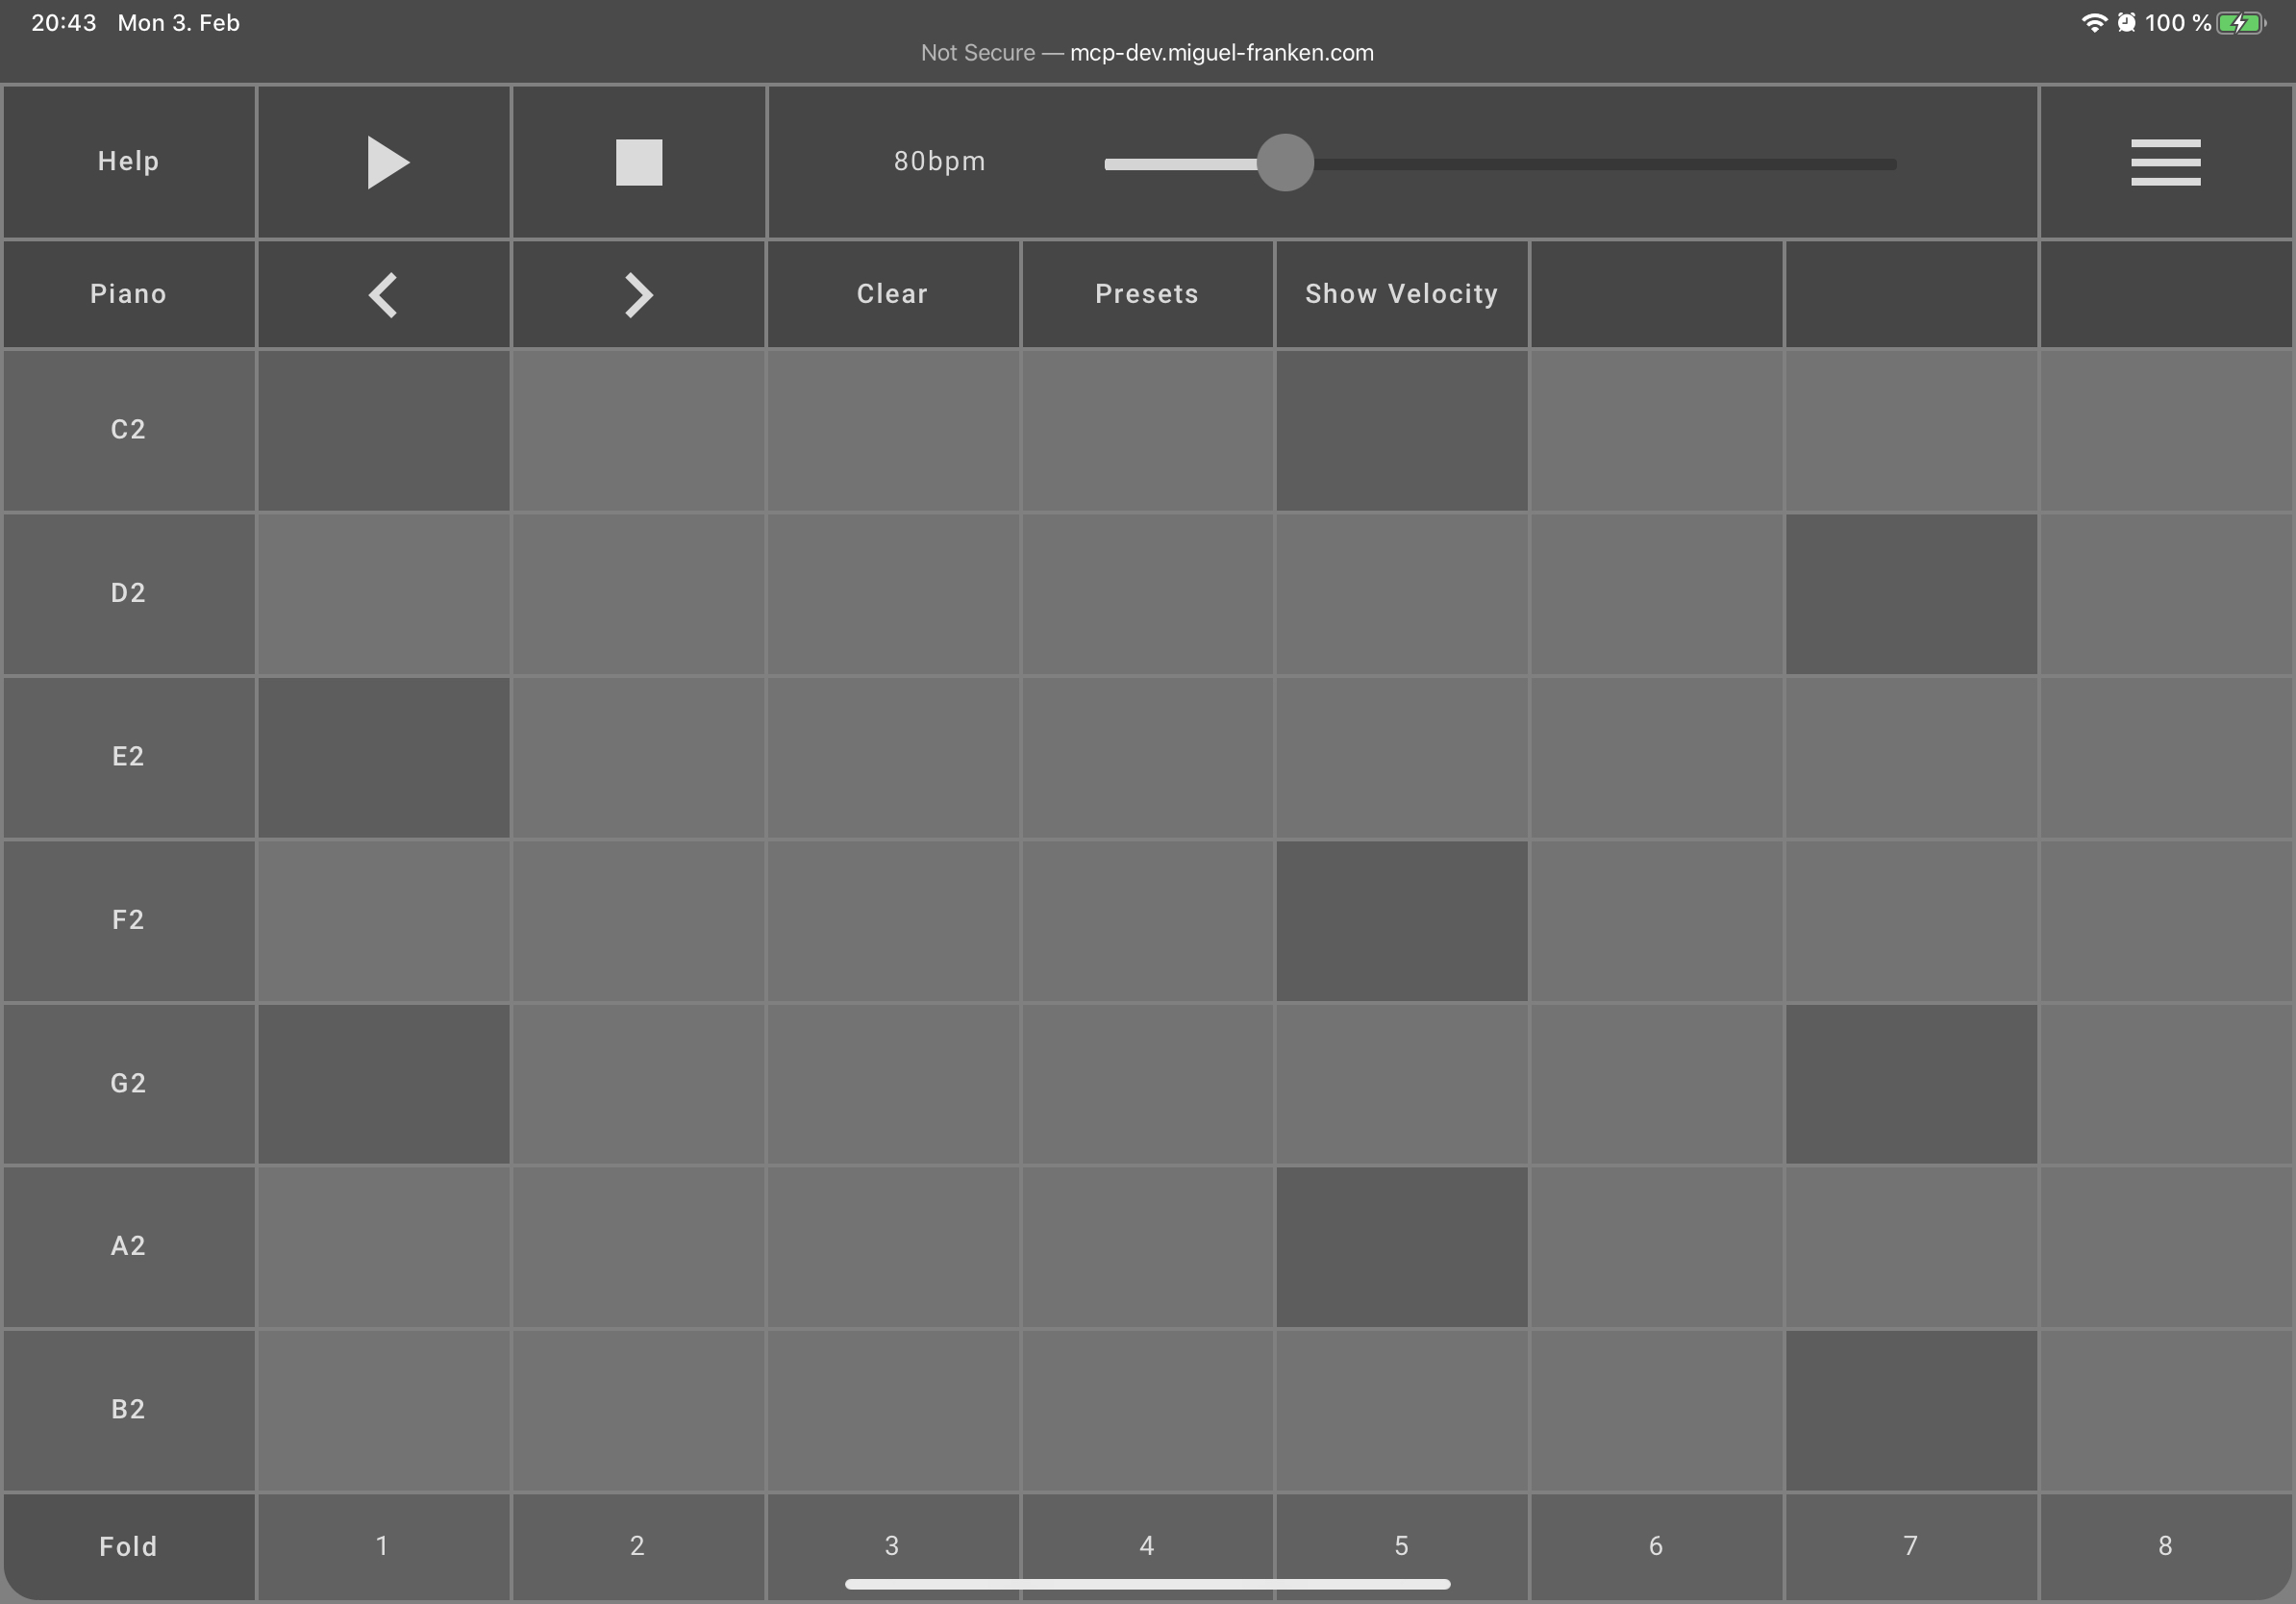
Switch Instrument
You can switch between the drums and the piano by clicking on the arrow buttons in the second menu row, or by clicking the button to their left that shows what instrument is currently selected.

Velocity
The velocity basically determines the volume of an individual note. By showing the velocity, a horizontal bar will appear on the bottom of activated notes. Dragging this bar to the left lowers the note's volume, dragging it to the right increases it. As usual for music programs that have similar representations, the background of a note is displayed according to its velocity. Notes with a higher velocity have a higher alpha value, while notes with a lower velocity have a lower alpha value, resulting in a more transparent background. This signifier makes it easy to see in the matrix which notes are played very loud and which are not.
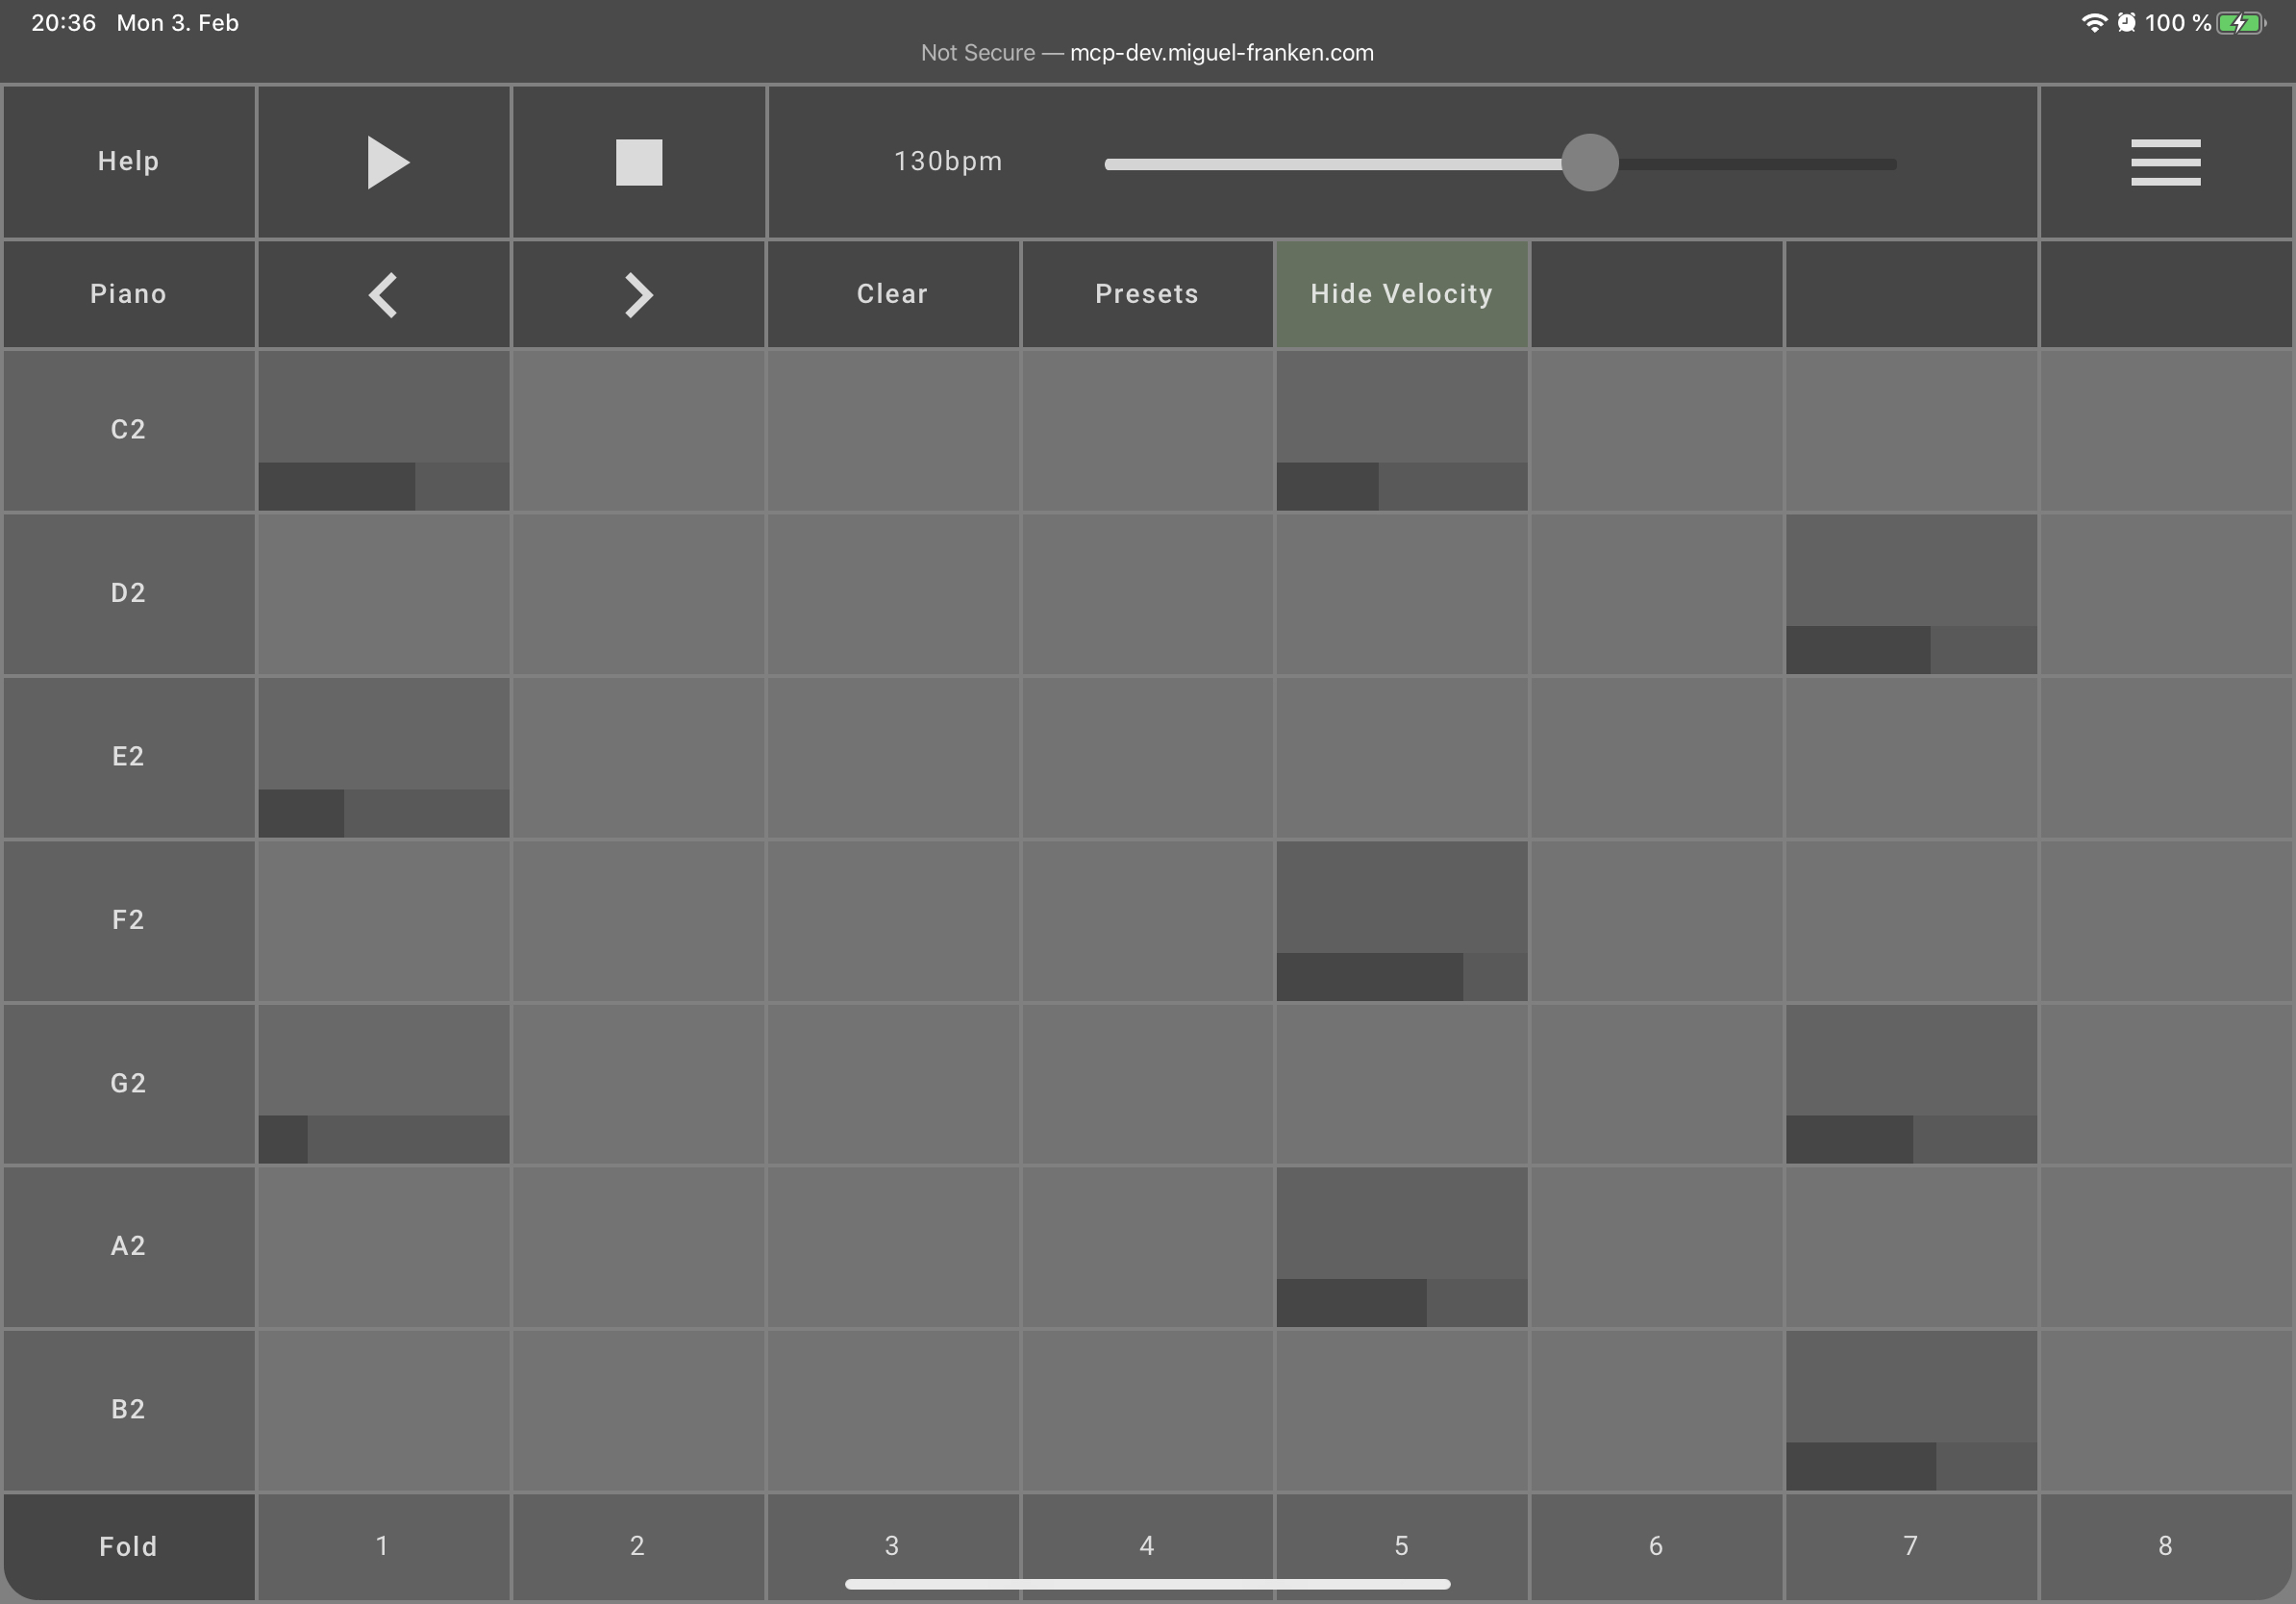
Shrinking & Folding
While the drum instrument at this time has only 3 different percussion elements, the piano instrument has many possible notes that can be selected in the matrix. This means that the matrix has more rows that allow input. The user must scroll vertically to see all the rows.
For a better overview, the height of the rows can be reduced, so that more rows can be viewed at once in the matrix. To activate the compact matrix mode, the shrink button in the instrument menu must be pressed.
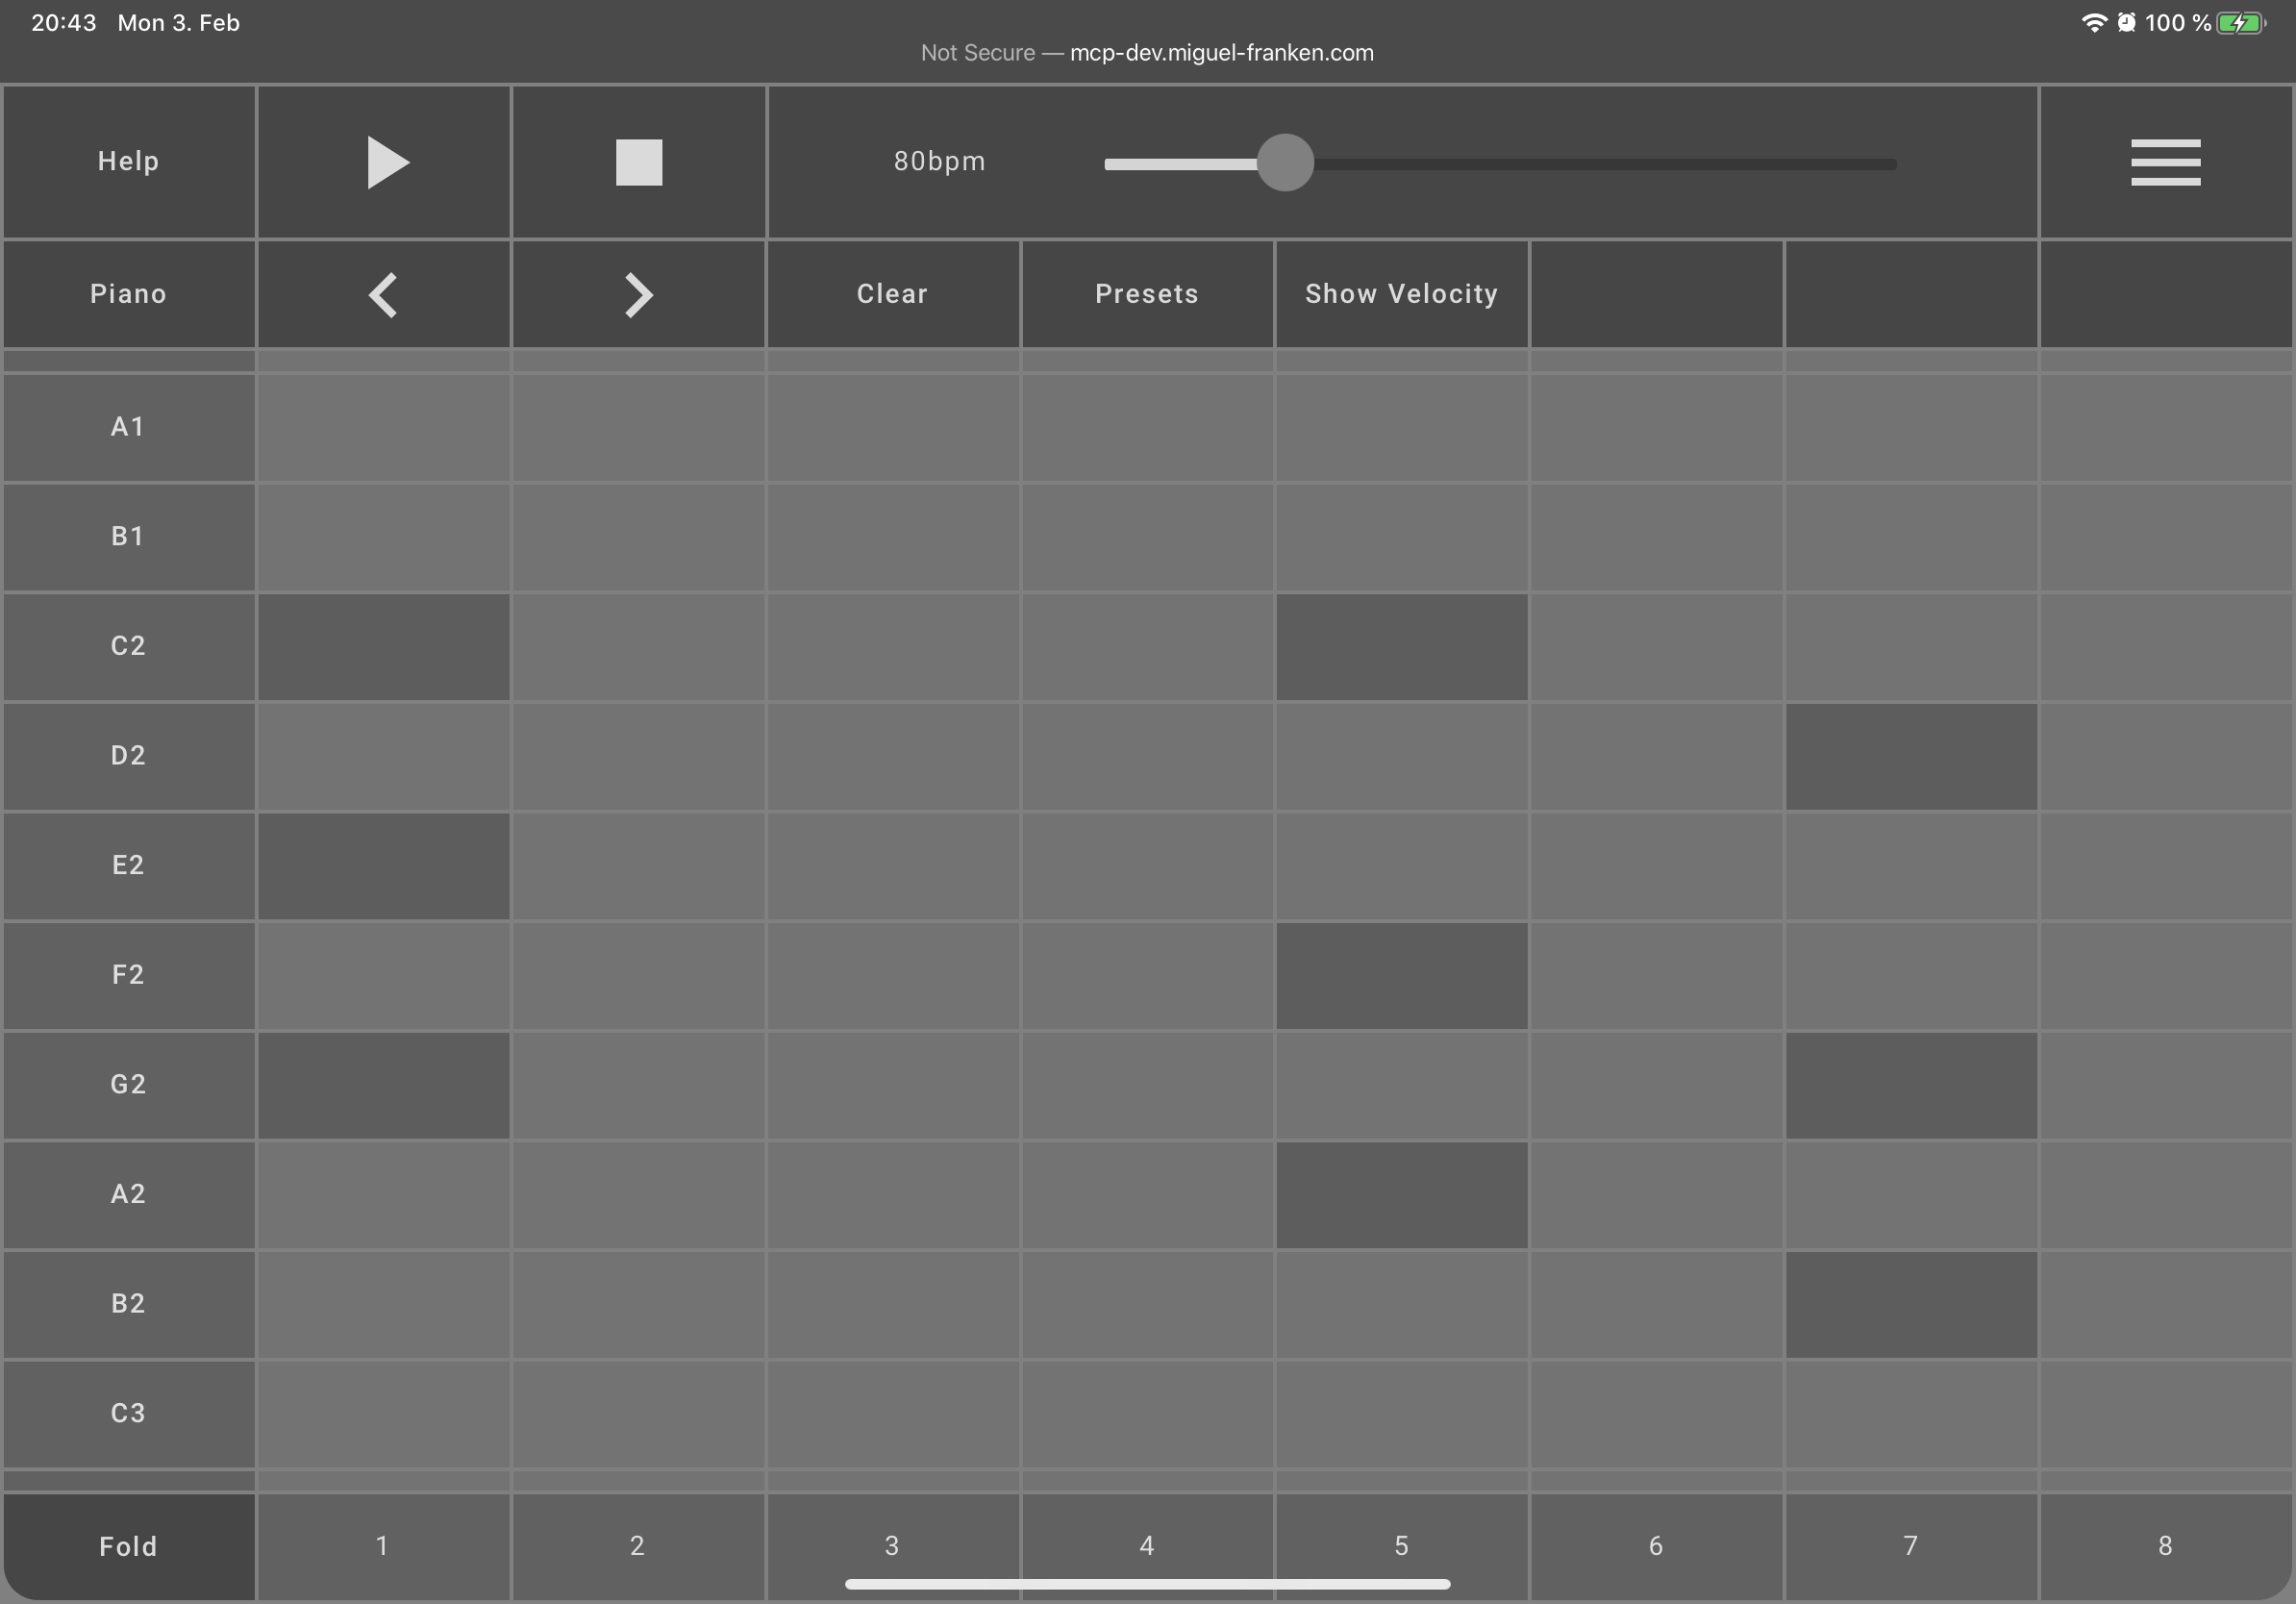
You can also choose to display only the rows in which a note is played. The fold mode can be activated by pressing the button in the lower left corner of the matrix. This view is especially useful for making subsequent changes to the velocity of individual notes that have already been defined.
Implementation Details
Used Technologies
- TypeScript
- The project uses Tone.js (API reference) for producing sounds (audio synthesis).
- The frontend is written using Angular.
- The Open Sound Control (OSC) protocol is used as messaging protocol
- WebRTC for real-time bidirectional communication between server and web application
- SocketIO is used to establish a WebRTC connection between server and the web application (exchanging signaling messages over sockets)
- Angular Material components are used for styling purposes
Networking Overview
The fabricated music instruments send via UDP control messages to the central server, which broadcasts the incoming message to all connected instances of The Mix for audio synthesis with the Tone.js library. The broadcasting allows each bandmate to hear in real-time the played music from the others by simply running the music controller web application on their own device. Unfortunately, the browser cannot listen for incoming UDP messages which we use to communicate with the instruments. Therefore, we decided to have a central server that listens for incoming UDP messages from the instruments and broadcasts them to all connected instances of The Mix opened in a browser. The Mix will connect to the server over WebRTC which allows real-time bidirectional communication between the two components.

Messaging Protocol
The messages sent by the instruments conform to the OSC message protocol, which is a widely used protocol for URI-style networking of sound synthesizers, computers, and other multimedia devices. Each OSC message contains a path and a set of arguments. The path specifies which action should be executed (e.g. the piano sampler should play a note) and the argument specifies further necessary control information for corresponding action (e.g. play note C4).
As part of the project, we defined an API that can be accessed by the various fabricated instruments. The full API documentation can be found here. For example, a piano sound can be output via the path /piano/play_note. For this, a set of arguments must be included in the message whose messaging format we document as follows:
[
  { s,note }, // Expects a note as string
  { s,duration }, // Expects the duration of the note as string
  { f,velocity }, // Expects the velocity [0,1] of the note as float
]
Implementing API Endpoints
Implementing endpoints that are triggered by received OSC messages is fairly easy as we implemented custom decorators, which makes implementing new endpoints straightforward.
The @Controller decorator sets the root route for the controller. Each @OnMessage defines a subroute which will call the method. The @Message decorator is used to simplify handling of OSC messages and is placed before the parameter.
@Controller('/piano')
export class PianoController {
  private piano: Piano;

  constructor(private music: MusicService) {
    this.piano = music.getInstrument('piano') as Piano;
  }

  /**
   * @apiGroup Piano
   * @apiName Play Note
   * @apiDesc Plays a note from the piano sampler
   * @apiPath /piano/play_note
   * @apiArgs s,note Expects a note as string
   * @apiArgs s,duration Expects the duration of the note as string
   * @apiArgs f,velocity Expects the velocity [0,1] of the note as float
   */
  @OnMessage('/play_note')
  public receivedMessage(@Message() message: IOSCMessage) {
    try {
      // Validate the passed set of arguments
      const note = TypeChecker.ValidNoteArg(message.args[0]);
      const duration = TypeChecker.ValidDurationArg(message.args[1]);
      const velocity = TypeChecker.ValidNormalRangeArg(message.args[2]);

      this.piano.play(note, duration, velocity);
    } catch (e) {
      // ...
    }
  }
}
Fabrication
We used 3D printing for various smaller parts such as buttons as well as laser cutting of wood, with which we were able to give the instruments a stable housing.